Contents
If you are a Divi developer, you need to know how to use the WordPress row block to create stunning and organized content for your website. The row block is a design element that lets you arrange your content in a horizontal row, making it a flexible block that can be used in different areas of your WordPress editor. You can use the row block to create custom templates, organize content within posts and pages, and create dynamic layouts with its drag-and-drop interface and customization options. By learning how to use this block, you can improve the user experience of your website and create a consistent and professional design. Whether you are new to Divi or an experienced developer, mastering the WordPress row block is a skill that will elevate your website design. So let’s get started and explore the many possibilities of this powerful tool.
What Is The WordPress Row Block?
The row block works similarly to the stack block. Instead of displaying items vertically, it displays blocks horizontally across the available space of the parent container. By default, the block will evenly space the blocks within it – and on smaller screens, it will display content in a grid format using the flex CSS property.
Create Amazing Websites With the best free page builder Elementor
Start Now
The row block is not necessary if you are using a page builder like Divi. The Divi Builder can be used to add rows and other elements with more advanced design options.
How To Add The Row Block To The Post or Page
We will use the Twenty Twenty-Three theme for this post, but you can use any block theme or full site editing theme to follow along. First, log into your WordPress account. Then, create a new page. There are two ways to add the block from the block directory to your site.
The first method is to use the block inserter. Click the block inserter icon at the top left of your page. Then, in the search bar, type row. Find it in the search results and either add it by clicking or dragging it into the page editor.
The second method is to use the slash command. Click the + icon on the page editor, or simply start typing /row to reveal the block results. Insert the row block into the page by clicking it.
After adding a row to the page, you can insert as many blocks as you want within that row. The way you stack the blocks determines how they appear. We will go over this in more detail in the next section.
By default, when you add blocks, they appear in the row from left to right.
Row Block Settings and Options
The row block has two sets of settings and options: toolbar settings and sidebar settings.
Toolbar Settings
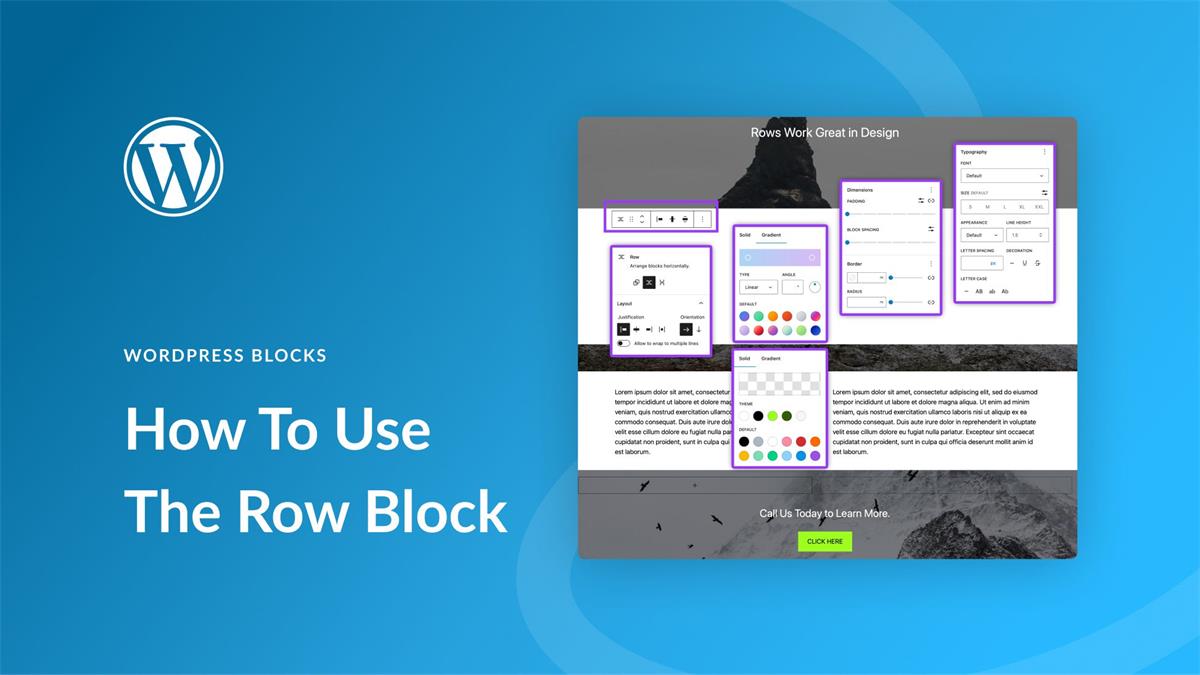
The toolbar settings group contains several settings, as shown in the image below:
- Transform to
- Drag Move
- Justification
- Vertical alignment
- Width
- More options
The first option is to transform to.
This option allows you to change the row block to a file block or a group block. A file block lets you display the audio file as a downloadable file, while a group block lets you add a background color or image to the row. In this example, I’m hovering over File. It shows how the audio file would look as a file block.
The Drag Tool is the 6 point icon that lets you move the block to any location. The Move Tool up and down moves the block up or down one content space each time you click on the arrow. Both offer an easy way to move the block around your content area.
The alignment options control the position of the block on the screen. The options are full width, right, and left. Choosing left or right aligns the content block to that side of the screen and wraps it around that side of the screen. Full width takes up most of the screen width.
The Replace option lets you change the audio file without deleting the block. You can choose a file from your library, upload a new file, or enter a file URL.
The More Options option contains the default settings present in most WordPress blocks:
- Hide more settings – this hides the right sidebar.
- Copy – this copies the block so that you can paste it elsewhere in your content.
- Duplicate – this adds an exact copy of the block below the original one.
Sidebar Settings
The sidebar settings group contains two tabs: block and color. The block tab has two sections: advanced and audio settings.
The advanced section lets you add a CSS class to the block. This allows you to style the block with custom CSS code.
The audio settings section lets you customize the appearance and behavior of the audio player. You can choose to show or hide the track name, artist name, and artwork. You can also choose to autoplay the audio file, loop it, or preload it.
The color tab lets you change the color of the audio player. You can choose from a preset palette or pick a custom color. You can also adjust the opacity of the color.
Tips and Best Practices
Here are some tips and best practices for using the row block on WordPress:
- Use the row block to create horizontal layouts and organize your content in a neat and consistent way.
- Use the justification and alignment options to adjust the spacing and position of the blocks within the row.
- Use the transform option to change the row block to a file block or a group block if you need more functionality or design options.
- Use the replace option to change the audio file without deleting the block.
- Use the sidebar settings to customize the appearance and behavior of the audio player.
- Use the color tab to change the color of the audio player and match it with your theme or brand.
- Use the advanced section to add a CSS class to the block if you want to style it with custom CSS code.
Frequently Asked Questions
Here are some frequently asked questions about the row block on WordPress:
- How do I add more blocks to a row?
To add more blocks to a row, simply click on the + icon at the end of the row or use the slash command /blockname to insert a new block.
- How do I stack blocks within a row?
To stack blocks within a row, drag and drop them on top of each other. You can also use the up and down arrows on the toolbar to move them up or down.
- How do I delete a row block?
To delete a row block, select it and click on the More Options icon on the toolbar. Then, choose Remove Block from the menu.
- How do I resize a row block?
To resize a row block, drag and drop its edges or corners. You can also use the width option on the toolbar to choose from predefined widths.
- How do I copy or duplicate a row block?
To copy or duplicate a row block, select it and click on the More Options icon on the toolbar. Then, choose Copy or Duplicate from the menu. You can also use keyboard shortcuts Ctrl+C and Ctrl+V to copy and paste a row block.
Conclusion
The row block is a powerful tool that lets you create horizontal layouts and organize your content in a neat and consistent way. By learning how to use this block, you can improve the user experience of your website and create a stunning and professional design. Whether you are new to Divi or an experienced developer, mastering the WordPress row block is a skill that will elevate your website design. So go ahead and try it out for yourself and see what you can create with this versatile tool.




Recent Comments